Sander Floor Drum

www.youtube.com/watch?v=AfKoAbXdmVY
Technical Specifications
Off Load Current 220/250V = 5A
Av. Load Current 220/250V = 8A
Switch No Volt Start Protection
Motor RPM 8,500
Drum RPM 3,300 (off load)
Sanding Drum 200mm (8?)
Abrasive Notched & angled ends P24 to P120
Weight Net 41.5kg (91.5lbs)
How to D.I.Y Your Timber Floors
It is a time consuming, dusty and difficult job BUT however it is mostly achieved by machines and the end result is worth every bead of sweat and labor of love you put into it.
Removing the old floor finish
Before sanding check the entire surface for exposed nails tacks or staples that can shred the sand paper during the sanding process.
Remove any sticky material that will clog the sand paper and fill any holes and dents with timber putty,
Clear and vacuum the room cover any vents, doors and seal any power outlets and switches before you begin. Open windows to allow ventilation.
Sanding
Starting with a heavy coarse grit paper (40) this will rip the floor flat and like new, then a 80 grit then the 120 grit to remove all sanding marks.
working with the direction of the boards from the center of the room to the edge always keeping the drum sander moving with the drum in contact with the floor.
Edging
The drum sander cannot sand right up to the wall, there is a section not sanded there fore the edger is used to connect the missed area.
again coming down the grits in sand paper to match,
Finish sander
At the end of sanding and after vacuuming give the whole job a sand with the finish sander. this will blend in the edging to the main floor, Hallways that have the timber running across and not with the room, plus use this sander in between coats to give that professional looking finish.

Slide title
Write your caption hereButton
Slide title
Write your caption hereButton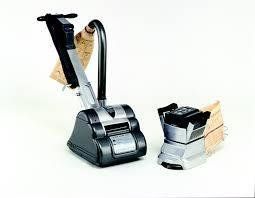
Slide title
Write your caption hereButton
Slide title
Write your caption hereButton


Quick Links
Contact Information
Business Hours
- Mon - Fri
- -
- Saturday
- -
- Sunday
- -


Hire & Rental Industry Association


